Friday, January 30, 2015

It's Curtains for Paws Awhile

If we're going to ask people to sleep on the new sofa-bed, we probably need to provide them with a little privacy, especially since our balcony is right beside the door where the neighbor comes out to smoke.


I went out shopping for some curtains to cover the sliding glass doors but came home empty handed. On the way back to the condo we stopped by our friend's house. She was taking down some curtains that she didn't need anymore.  She offered them to me.  I didn't think they were wide enough for the sliding glass doors, but I took them anyway.  They were the kind that have the 3 pleats at the top, and as suspected, they were too narrow.  But, if I undid the pleats and added some grommets, I decided that they would cover the space nicely.


The fabric at the top of the curtains was too thick though and the grommets would not close around it so I had to trim some of the excess fabric.


The grommet package had a template for cutting the holes in the top of the curtains.


I marked and cut the holes, pinning the fabric around the template so that I could cut all of the layers evenly.

 I had trouble getting the grommets to snap together until I figured out that I needed to apply even pressure to the entire ring.  This was accomplished using a wooden coaster.


I had to do some math to space the grommets out correctly. Once I got all of the grommets installed, it was time to mount the curtain rod.  I used a handy-dandy battery operated level thingy that I found in the junk box to make sure I got it level.


I hung the curtains and stood back to admire my handy-work!


Now our sofa-sleeping guests will have some privacy...


...but they'll have to get up early because these are not room-darkening curtains.


Oh well, I guess beggars can't be choosers!


Sofa So Far


Paws Awhile is petite (~800 square feet), therefore it was dwarfed by the giant sofa that came with the unit.


We needed a smaller sofa to make the space seem larger.  We wanted a sleeper sofa in case our number of guests exceeded the capacity of the sleeping surfaces. We searched high and low for just the right sofa at just the right price.  You may remember from a previous post that I found one locally in Fernandina Beach for $2500 which was out of my price range.

Jennifer Convertibles in Virginia had almost the identical sofa for $399.99.


The drawback is that Jennifer would not ship to Fernandina Beach or even Atlanta.  They wouldn't even let us order the sofa over the phone, so...  ROAD TRIP!!!

We took a Saturnday morning flight to Washington, DC and took their marvelous public transportation to the Jennifer Convertibles store in Bailey's Crossroads, Virginia. We bought the sofa and scheduled a date to pick it up at their warehouse.  The warehouse was only open for pick-ups on Tuesdays after 1PM.

We looked into options for transporting the sofa and found most options to be too costly so we finally settled on renting an Alamo minivan.  Apparently Alamo was interested in moving some minivans to Florida for the winter because our rate was $38/day with no drop charge!  We weren't sure whether the sofa would fit, but with fingers crossed, we flew back to DCA on Tuesday and picked up our minivan. We folded down all of the seats in the Alamo parking lot and decided our plan was going to work.

We got to the warehouse early but they wouldn't give us the sofa so we had lunch at a nearby Wendy's and went back at 1PM on the dot.  The sofa fit perfectly in the back of the van.  It looked a little like a coffin back there.


The 10 hour drive was pretty uneventful. We listened to a book and before we knew it, we were pulling into Sand Dollar Villas just before midnight.  Then came the challenge of getting the sofa up to our unit. We were very thankful that our complex has an elevator. I don't think we could have carried it up the stairs.  Sliding the box worked well!  We deposited the sofa just inside the door and went to bed.  

After checking flights, we had decided that if we wanted to get home the next day, we would need to be on the 5:30AM flight, meaning a 3:45AM wake up call.

A few weeks later, I flew back down to unbox and assemble the sofa. I'm guessing if we had bought the $2500 sofa it would have been delivered, assembled and set up. 


There were great instructions in the box though, so I got it assembled pretty quickly.


Now we are ready for guests!  (Tony says we would only put people we don't like on the sofa-bed, but we had this same sofa-bed in our motorhome and WE slept on it.)


The sofa is even comfortable to curl up on for an afternoon nap!


We thought we would have to recruit our friend with a truck to haul the old sofa off, but we found that we could schedule a pick up from the local charity, Barnabas.

The sofa only came in two colors, neither of them very beachy, so I bought some Tommy Bahama fabric and started the re-upholstery job.  


I have only gotten the cushions covered so far, but I am really liking the look! The fabric is indoor-outdoor so hopefully it will resist stains from suntan lotion, dog drool and the like!


That's it for the so far sofa... so far...  stay tuned!

Tuesday, December 30, 2014

Puzzle Keeper - Kinda Fail

I love to keep a jigsaw puzzle going when we are at the beach. At our little condo, Paws Awhile, this presents a bit of a challenge.
 
First, we only have 1 table and if I spread my puzzle over it, there is no place to eat or play games.
 
Second, there's Lola and Lucy. Lola would have a heyday knocking puzzle pieces to the floor for Lucy to chew. So, I decided to make a puzzle keeper.
 
These can be purchased pretty reasonably on Amazon, but I thought it should be simple to make. I had some left over felt, so the cost to make it should be negligible.
 
First, I would need a pool noodle. Even in a beach town, it is almost impossible to find a noodle in December. We went to Wal-Mart, 2 Dollar Stores and 2 Surf Shops before finally getting an overpriced one at Alvin's Island. I needed one with a large diameter, but they only had small ones, so I thought I could make it work.
 
 
I wanted it to be the exact size of the table to give me room for even the largest puzzle. My felt was not wide enough so I had to sew an extra section to it.
 
 
I hemmed the edges so the puzzle pieces couldn't slip out the sides. Attaching the felt to the noodle was the hardest part. Since I thought I would try to remake this later with a larger noodle, I didn't want to do anything permanent so I hand basted the felt to the noodle. I couldn't get it very tight. When I remake it, I will use fabric adhesive to get a tight fit.
 
I was going to attach some Velcro straps, but decided to try it out first. I dumped my 500 piece puzzle out and started working on it. (I learned never to dump a puzzle from the box onto a piece of felt.  There is a lot of cardboard dust in the box that is hard to get off of the felt.)
 
When I got the edges together, I rolled it up and then unrolled it to see the result. The edges stayed together fairly well, but some of the other pieces stuck to the felt and were flipped to the floor or wound up under the felt as I unrolled.
 
 
I think it will do for this trip, but improvements are definitely needed.  I shouldn't have made it quite so big for 2 reasons.  1. It is hard to roll it up because it is too long. 2. The table is really too large to see from one side to the other with both leaves extended. When I remake it, I will make it the size of the table with only one leaf extended.
 
Okay, going to work on my puzzle now (without cheating and looking at the box top).
 
Happy New Year!

Sunday, November 30, 2014

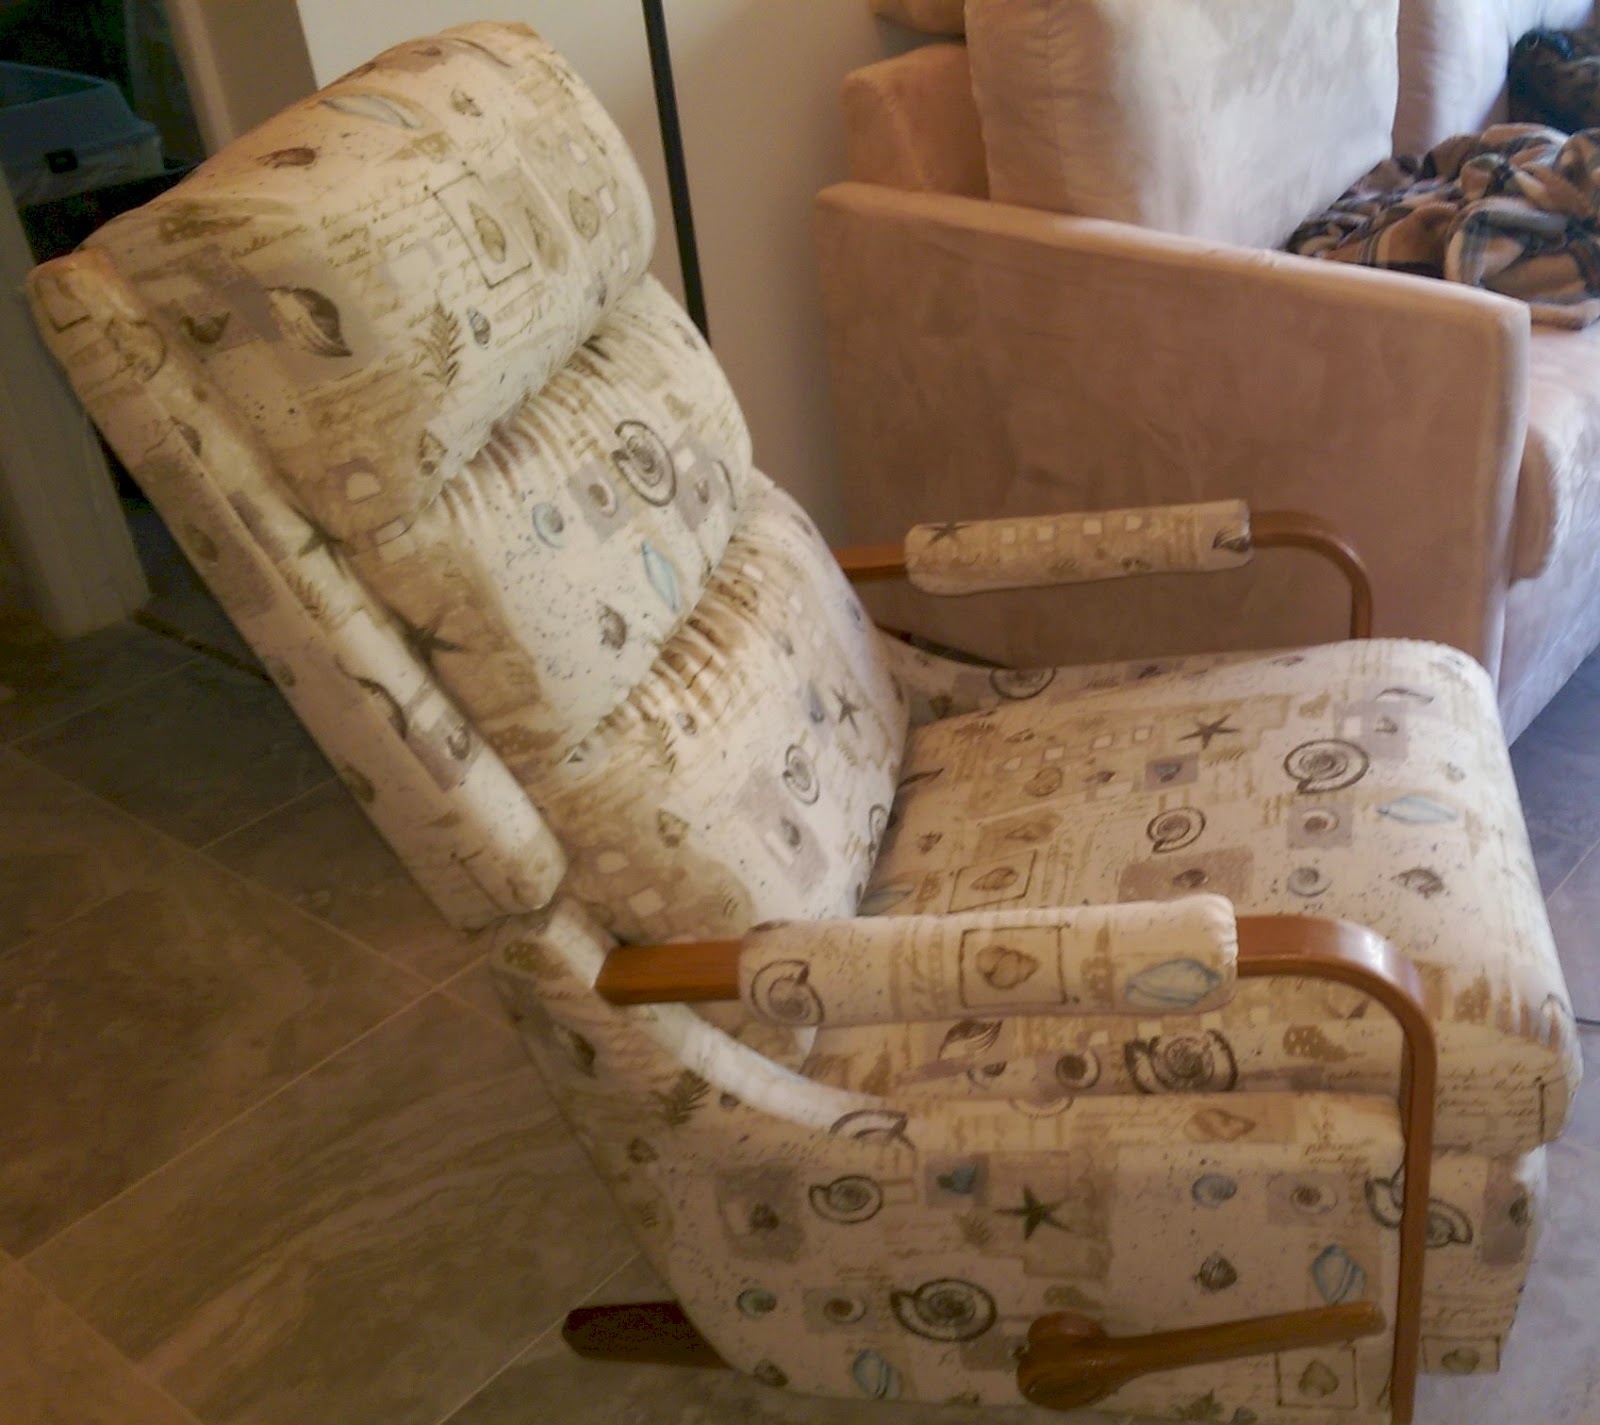
Paws Awhile - Re-Upholstery 102 - The Beach Recliner

Our beach condo came furnished, but I think their decorator may have been Amish. The decor was more that of a quaint old farmhouse than a beach condo. We elected to keep only a few things, among which was this old comfy LA-Z-BOY recliner complete with its worn dirty herculon upholstery.

It definitely needed a facelift! I picked a beachy outdoor fabric that will hopefully be stain resistant against sunscreen, sand and salt water.

Here's what I needed in my arsenal to start this project:
Toolkit (complete with an assortment of screwdriver tips and sockets.
Staple remover
Sewing machine & extra needles
Pins 
Fine tipped scissors (I love these)
Electric Staple Gun & Staples
Sharpie
Fabric (I used an outdoor fabric since this chair will be used at the beach).
Upholstery Tack strip
Reading Glasses
Assistant (somewhat reluctant)
Time
Patience
Understanding Neighbors (if you live in a condo)
Sense of Humor

First I took "before" pictures. You always want to do that so you can get that sense of accomplishment when you look at your finished product. You should also take lots of pictures during the dissassembly so you can remember how to re-assemble the chair.  I'll show you those "before" pictures at the end of the blog, next to the "after" pictures.

Next, I removed the back. LA-Z-BOY had instructions on their website so that part was easy. 

I wanted to start on the arms because I predicted that would be the most difficult part. I wasn't sure how they were attached. Using a screwdriver, hammer & staple remover, I removed the fabric from the side of the chair so I could see how the arm was attached.

With the help of my reluctant assistant (my husband, Tony), we figured out that there was a screw and two bolts inside the side of the arm at the front attaching the front of the arm to the chair.  

At the back was a long screw that attaches to a little screw looking thing that slips up into the bottom of the arm. This picture shows where the back screw is located.

Once you get the fabric off, you can see where to insert the screwdriver to remove the screw. Watch for the little receiver piece that will fall out of the arm when you remove the screw. You'll want to save that for the reassembly step.

Next, I needed to remove the seat bottom so that I could get to the inside of the side panels.  Four screws on each side held the seat bottom to the metal inner workings of the chair. 

I had to kick out the foot rest to get to one of the screws holding the seat bottom.

With the seat bottom removed, I could get to the inside of the side panels to remove the rest of the fabric. I tried to leave the foam rubber in place as much as possible. I only removed one of the side panels so I would have the other one to refer to when I attached the new fabric to the other side.

I was very careful when removing the old fabric so I could use it as a pattern to cut my new fabric.  I cut notches and made markings with my sharpie on the old fabric to remind me how it should be assembled.

Since I needed two side panels and they were the same size, I was able to double the fabric and cut two at the same time.

 I was careful to notice the direction of the pattern on the new fabric and make sure I didn't cut the pieces upside down.

I matched the notches and pinned the pieces together easing the fabric at the curves so there would be no puckers or wrinkles.

I sewed the side pieces together and started attaching the piece to the chair using a staple gun. I realized that I would need to replace the fabric underneath the footrest before I could reattach the arms since one end of it needed to go under the wooden part of the arm.

I got that done, got one side upholstered and the arm reattached. The other side went very smoothly. I just had to remove footrest lever using an allen wrench. Thanks again to LA-Z-BOY for posting how-to videos on their site.

With the sides finished and arms reattached, I removed the cover from the seat bottom and prepared and attached the new cover using the same method as above. The bottom was the easiest part to cover.

Next would be the seat back, the part I dreaded the most. I started by carefully removing the back panel. I wanted to reuse the metal tack strips so I gingerly pried them loose.

The seat back had little "arms" on each side that were attached with bolts.  After taking the back panel off, I removed and recovered these little "arms" using the old fabric as a pattern.


 I removed the hardware from the side of the seat back and removed the staples holding the cover in place.

Under the cover, I found that the foam and fiber-fill was divided into 3 sections. I carefully removed and labeled the sections and set them on the bed in the spare bedroom (and shut the door so the cat would not destroy them).

The back fabric was one piece gathered at the seams between the sections. I measured and gathered my fabric to the same dimensions. I removed and reused the black backing from the chair.

I sewed the center bottom seam first, then inserted the center foam and batting and sewed the center top seam with the foam/batting in place. It was difficult to sew so I moved the needle to the left-most position and that helped. Then it was just a matter of inserting the top and bottom foam/batting and stapling everything in place.   I reattached the arms and the hardware.

For the back panel, I reused metal tack strips at the sides, carefully measuring and sticking the nails through the fabric at precise intervals to make sure the back panel was the exact size of the old one.  I used the cardboard upholstery tack strip at the top and stapled the panel on upside down so that when I turned it down, the staples were under the fabric.  Then I just tapped the metal tack strips into place, using an old piece of fabric between the hammer and the chair.
   
I almost forgot the foot rest, but it was quick and easy to cover compared to the rest of the chair. 

Finally, I was ready to relax in my beautiful new beachy recliner!


Here are the before & after pictures:


Monday, October 6, 2014

Baby gets new shoes!

Fall weather this weekend made me want to curl up on the sofa with a blanket & do some crocheting. I decided to see if I could make a mate to the little bootie I had recently finished. I started out following a pattern but at some point deviated from the pattern so I had zero confidence that I could make a matching bootie.  But, what good is one bootie so I decided to try.

I finished it last night and they looked reasonably similar. I was too tired to put away my embroidery so I covered it up with a blanket thinking that Lola, our pretty but not-so-smart cat, would not find it.  Wrong!  I woke up this morning to find the thread strewn all over the house, wrapped around chair legs, under tables, around sofas and even circling the TV. There was no sign of the little booties. I feared they had been chewed up. Lola doesn't usually chew things herself, but hands them off to Lucy, our chihuahua, to do the dirty work.  Sure enough, one of the booties was in Lucy's crate but Lucy hadn't had a chance to chew it. The other one was between the sofa cushions, also intact!

The booties are too small for a real baby (as was the hat I made recently) but they fit my vintage baby doll perfectly, don't you think?


The baby doll, with its hat and shoes are hidden away in an upstairs bedroom that Lola cannot get into no matter how hard she tries because she has no thumbs! You can see from the look in her eyes that she is trying to figure out a way though!

"If only I had thumbs..."
 
If anyone has any crochet patterns for hats or booties that will fit a real baby let me know!