Monday, January 22, 2018

Playing Real Life Monopoly (aka Retirement Home Search)

Finding our retirement home has been quite an adventure.  Tony announced his desire to retire to "a place where I can sit in my wheelchair and overlook big water."  I disagreed, stating that I hoped to never sit in a wheelchair!

Our initial search started in 2006 - in Ireland, shortly after Tony left Delta.  We made 4 trips to Ireland in 2006 and 2007, searching for a home or a nice lot where we could build.  We thought we had found the perfect lot, and made an offer, but as we did our diligence, we discovered that the cost to build was prohibitive.  It turned out to be a good thing we didn't settle there because Delta cut back on service so travel back and forth to see friends and family would have been difficult.

To read more about our Ireland quest, you can click on these links:

Once we gave up on retiring to Ireland, we started our search in the United States.  We looked at Coastal North Carolina and Beaufort, South Carolina.  We made an offer on a property in Beaufort but were unable to come to an agreement.

To read more about our quests in the Carolinas, you can click on these links.

We decided to look around Florida for a place to settle.  Key Largo was very inviting but we learned the houses were out of our price range and it was impossible to get a building permit for a lot.  You have to buy two and agree not to build on one of them, or win a permit lottery.  We started looking at places on the panhandle.  We ended up buying a lot in Carrabelle and drawing up house plans but when we investigated the building cost, we found that we could buy an existing house on St. George Island for less than the cost of building, so that's what we did.  We bought Beauty and the Beach, a tall-skinny structure right on the beach!  We loved it!  We kept it in the rental pool with "Resort Vacation Properties" until we were ready to move there.  We made a few trips a year and ultimately decided that the island was just too remote and undeveloped to live on full time. We sold Beauty and the Beach in 2016.

To read more about Beauty and the Beach on St. George Island, you can click on this link:

Our search finally took us to Fernandina Beach on Amelia Island.  We hadn't really gotten serious about it yet when a friend called and told us about an incredible deal on an oceanfront condo.  We weren't really looking for a condo, but didn't want to pass up a great deal.  We planned to look at it and two other condos but when we found out the other condo buildings were not pet friendly we didn't even tour them.  We bought the condo at Sand Dollar Villas and named it "Paws Awhile on Fernandina Beach".  We decided it would make a good home base for us while we looked for our perfect retirement home.

To read more about Paws Awhile on Fernandina Beach, you can click on this link:


We visited Paws Awhile frequently from 2013 until 2016 while we searched for the perfect beachfront lot.  We looked at a number of houses and lots and made offers on several properties.

Our first accepted offer was for a 50 ft wide lot just South of the "Log Cabin" at 510 S Fletcher Avenue.  We had a 30 day due diligence period.  Following several meetings with the city planners, we feared we would not be able to build on the lot due to a dune located in the middle of the lot so we retracted our offer.  Someone has since built a home on that lot!

We made a backup offer on an empty lot at 708 S. Fletcher Avenue and when it ultimately closed, we made an offer to the new owner to no avail.

I got some experience bidding on a foreclosure on the courthouse steps. The property at 2910 S Fletcher was advertised as a "Distress Sale".  We were not allowed to see the inside before bidding on it.  We came up with a maximum we would be willing to pay which was somewhat less than what was owed on it.  Tony had to work so I was on my own for bidding.  It was very exciting but I never really had a chance.  The representative from the bank outbid me by $100 each time I bid until I reached our maximum.  I walked away with an incredibly speedy heartbeat but no house!

Our next offer was a fiasco!  We saw listings for 3 lots (listed as lots 4, 5 and 6) on South Fletcher Avenue. We found the 3 adjacent lots.  Building had started on lot 4, but lots 5 and 6 (identical 75 foot wide lots) were still for sale.  Lot 6 was priced much higher than lot 5 so we made an offer on lot 5 with no due diligence period since we could see that it was a nice flat buildable lot!  The offer was immediately accepted and we celebrated with friends on the site of our new home.  A few days later, we discovered that we actually had an accepted contract on a different lot!  The lot we celebrated on was Lot 5, Block 24, a beautiful flat 75 foot wide lot.  The lot we actually had a contract on was Lot 5, Block 10, a 50 foot lot just 2 doors down from the first lot we had decided was unbuildable.  This one had a dune even closer to the street.  The sellers were kind enough to let us out of the contract and even gave us back our earnest money. Whew! Meanwhile, the lot we thought we had purchased was under contract.  We asked them if they wanted to sell, but they didn't.  We made an offer on Lot 6 but could not agree on a price.

Image result for Spongebob house Fernandina Beach, FLWe looked at the "Sponge Bob" House. The location and view were fabulous but it was just too weird.  First there was the outside - painted a different color on every side (reportedly because of a dispute with neighbors). Then there was the inside.  It was essentially a 1 bedroom, 5 bath house with a 6 burner cooktop and no oven. The master closet was a rod in the master bathroom next to the toilet!  Someone has since purchased it and painted it powder blue and there is some construction going on, so hopefully they can make it livable!

Charming Lighthouse Right on the Beach!
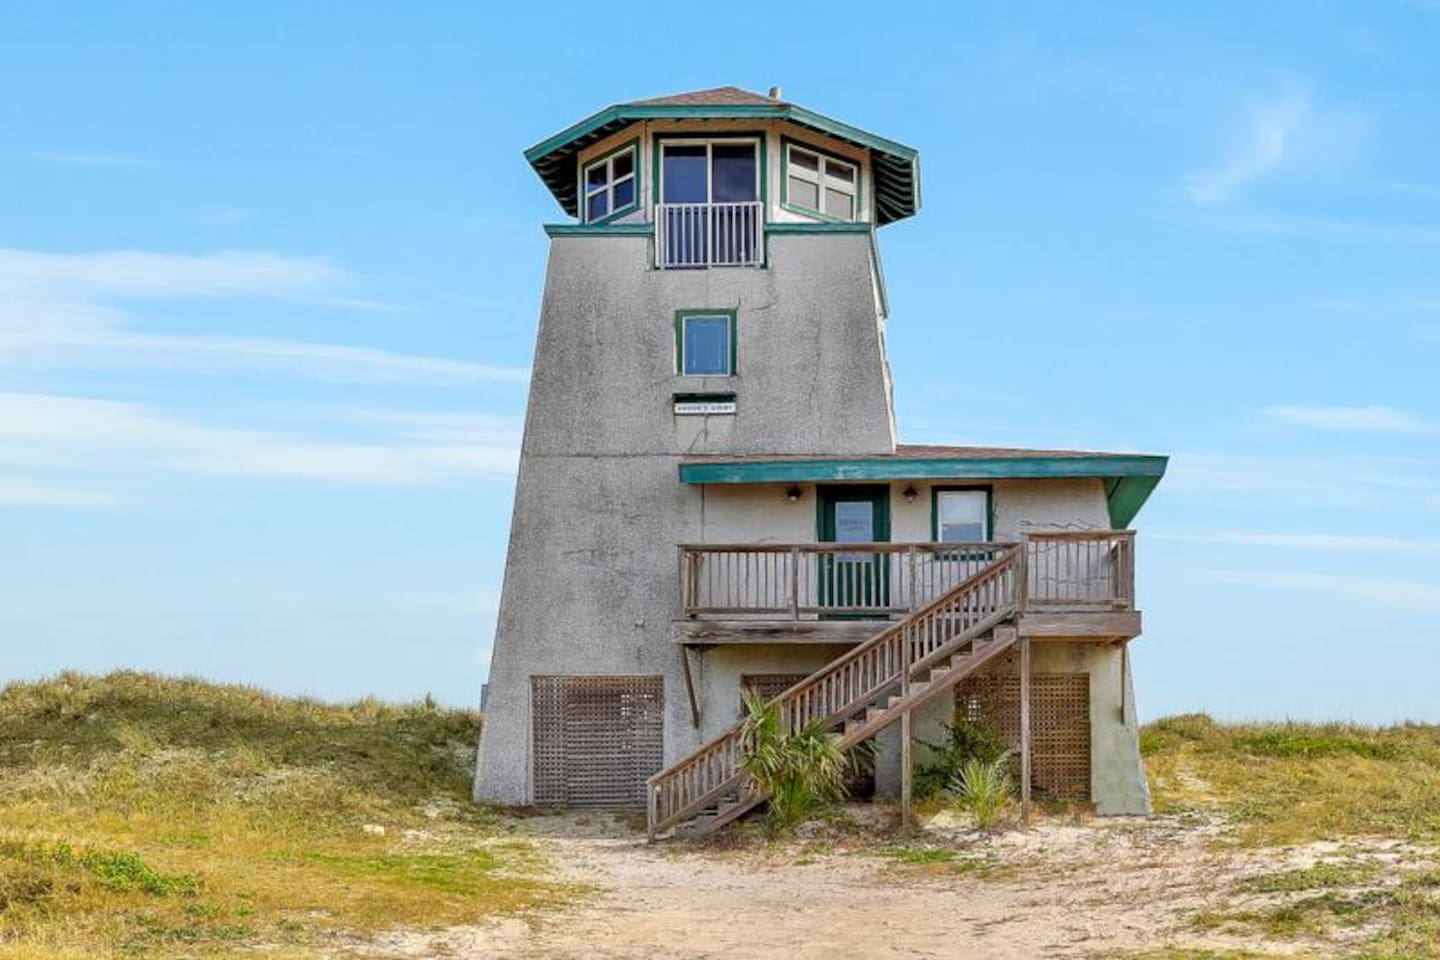
FINALLY, we found and closed on our retirement property in February 2016!  It was the property known as "Green's Light" or, affectionately just called "The Lighthouse".  It was a rental property that was built in 2000 but looked much older.  We kept it in the rental pool through the end of 2016 and provided a vacation home to a number of guests.  We took it as our primary residence for homestead exemption in 2017 while we worked on finalizing house plans and getting a building permit!

To see more pictures of the Lighthouse, click on this link and then select "View Photos":
https://www.airbnb.com/rooms/11818145

Getting a building permit was a huge hurdle!  Because our lot is behind the Coastal Construction Control Line we had to get permission from the state.  Before we could submit our plans to the state, we had to get a favorable opinion from the city.  There was a time crunch because a new flood zone map would place our property in a flood zone with different building requirements.  Our architect and engineer worked hard to get us a set of plans we could submit to the city and then the state.  The minimum amount of time the state will take to review the plans is 3 months but we heard horror stories of approvals taking a year or more.  We were thrilled when our approval came in only 3 months.  Our builder was able to get the plans submitted to the city in July prior to the new flood map going into effect on August 1!

While we waited for our permit, we looked into what it would take to clear our lot.  We put an offer on Facebook to give the house free to anyone who could move it off of the lot.  The local newspaper picked up the story and Action News JAX came out to interview us.  We got lots of interest, but in the end, nobody was able to afford to move the house.  Even if we had been able to come to an agreement, it probably would have fallen through since the house took on some damage with Hurricanes Matthew and Irma.

In 2018, we demolished the lighthouse to mixed reviews from Fernandina Beach residents.  Some thought it was a landmark while others thought it was an eyesore.  We thought it was a cute beach rental but we wanted a real home on this beautiful lot. It was a hot topic on Facebook.  I put a notice on the Amelia Island Fernandina Beach Network Facebook Page the day before the demolition to give everyone a chance to take one last look.  The post got 412 "reactions", 109 comments and 105 shares! The Fernandina Beach News Leader showed a photo of the rubble after the demolition and Action News JAX did another story on it.

Stay tuned!  I'll be posting more about the building of "Sand-torini", a house inspired by our wonderful vacation to Santorini, Greece!

Saturday, April 22, 2017

Paws Awhile - Guest Bath Remodel

We are getting Paws Awhile ready to be a rental condo!  We finished the remodel of the kitchen/dining/living area/master bath last year.  Both bedrooms have been redecorated, the last project to remodel the guest bath is now in the books!

The old bathroom was in need of an update.  The formica vanity had no storage, the fiberglass tub enclosure was old looking and the decor was a bit dated.


I wanted to get this done during the winter when we were less likely to have friends at the beach so I started the demo work when we got back to the beach after Thanksgiving.

Tony helped me rip out the sink, vanity and half-wall. We couldn't find a bit for the proprietary screws that held the vanity/counter in place so a sledge-hammer and crowbar had to do.  We made a bit of a mess of the sheetrock.


When we removed the mirror, behind it we found a bit of artwork folded up behind it.  We're guessing it was left by a past teen-age boy guest of the condo.  I had to black out some areas to make it safe for posting!


Next on the agenda was to remove the old ceramic tile. Using a hammer and a screwdriver, I carefully loosened the grout and then pried up the old tile.  I was hoping to save the subfloor.


After removing a couple of tiles, I realized that the subfloor was probably not going to be salvageable.  I found some water damage around the tub and it looked like the subfloor had been patched a couple of times.  The edge of the plywood under the tub was not even supported by a joist!

The hammer/crowbar method made the work go a lot faster.  I had to be very careful not to break the flange when removing the tile around the toilet.


To get the popcorn ceiling down, I used a garden sprayer to moisten the ceiling and a sheetrock scraper to remove the popcorn.  It was a messy job but kind of fun!


Once the scraping was done, the ceiling would need a skim coat and some sanding.  That wouldn't be nearly as much fun so I decided to save that job for Herb, the handyman!


We used a reciprocating saw to cut up the old fiberglass tub so it could be removed easily. The power tool was such fun that we took turns using it.  We were careful not to cut through any plumbing.  We cut around the tub handle and drain and left them in place until we were ready for the plumbing part of the project.
 

Using a steamer, I removed the old wallpaper border. It came off easily after a bit of steaming.


I talked Tony into going with me to Home Depot to get the supplies for prepping the floor and walls for the tile.  After we carried the heavy tub, toilet, plywood & cement board up to the condo, I decided that installing it might stretch the limits of my ability so I contacted Herb, the handyman and asked him to put me on his schedule.  His list of tasks included:

  • Install the new subfloor
  • Repair the sheetrock around the vanity
  • Skim & sand the sheetrock on the ceiling
  • Install the durock for the tub surround
  • Install the tub and drain
  • Prep the plumbing for the new faucet/shower head

While Herb and his helper, John were working on their tasks, I opened the box and inspected the new tub.  I discovered that part of the enamel was chipped off. I got John to help me load it into my van and back to Home Depot I went to exchange it.  This time, I opened the box and inspected the tub before I took it up to the register!


Herb and John did a great job getting everything ready for me.  My next task was to paint (my most hated task).  I had to paint the ceiling and the walls.  Thank goodness it is a small room.


After painting, I installed a new light fixture.

I was planning to use the same tile as the rest of the condo but when I got to Floor and Decor, I discovered it had been discontinued. I found enough of it to do the floor at the Kennesaw Floor and Decor location.  Thankfully my friend Nancy was driving down from Smyrna the next week so I ordered the tile and she was kind enough to pick it up and bring it to me.

I found a great deal on a vanity set at Home Depot!  It included the base, top, sink and mirror for $150!  I found a paint chip that matched the top of the vanity so I took it and a floor tile back to Floor and Decor to pick out tile for the walls.  I really wanted porcelain but couldn't find anything I liked so I settled for a 12 inch ceramic tile. It was very cheap so I bought a couple of extra boxes which turned out to be a good thing because many of the tiles were chipped or broken.


Tiling the floor was relatively easy. The only really tricky part was cutting the circle around the toilet drain.  I went to Ace Hardware and bought a diamond dremel blade to cut the circle.  It took a long time to cut through the thick porcelain.  Thankfully my measurements were correct and the tile fit in place perfectly!


Once I finished tiling and grouting the floor, I asked Herb, the handyman, to come back out, seat the toilet and install the vanity and mirror.  I think I could have done this myself, but since it involved plumbing, I decided to leave it to the expert.  With the toilet and sink in place, at least we would have a half-bath until I could get the tub enclosure tiled.  Oh, I had forgotten to have Herb put a cubby-hole in the shower for the shampoo/soap, so I asked him to do that too.


It was finally time to tile the tub enclosure.  The hardest part was deciding where to start.  I wanted to make sure everything was level and square and that my trim line was in the right place. The tub slanted toward the drain so I knew the bottom row would have to be cut to make it level.


Once I got started, it went pretty quickly.


I utilized the same method with the dremel tool and the diamond bit to make the cuts around the plumbing.  Figuring out the cuts for the cubby hole were a bit complex since the tile I chose did not have a matching bullnose tile.


I decided I did not like the tile I had chosen for the accents so I ran to Home Depot to see if they had something I liked better.  Every home project seems to require about 25 trips to the hardware store!  I needed more pre-mixed mortar too.  I found a glass mosaic tile that coordinated beautifully with the tile.


Grouting came next.  I made the grouting mistake I always make and waited too long to clean the excess grout off of the tile, causing it to take much longer than it should.


With the hard work done, all I had to do was install baseboard molding, add a shower curtain and a few towel racks.


The new bathroom is now ready to accept guests!

Sunday, June 19, 2016

I'm a little Stuc Up!

I noticed the stucco next to our front door was buckling a bit and starting to fall off of the wall.  I applied duct tape over the cracks until I could get it repaired.


I called four different stucco repair companies and finally got someone to come out to take a look.  A very nice man looked over my problem and promised to email me a quote.  That was the last time I heard from him.  I emailed and called multiple times but was never able to get him to respond. I couldn't get any of the other stucco repair folks to return my call either. I have a handyman who can do almost anything so he came out to see if he could handle the repair.  He said it was too much for him.

So, left with no other options, I started watching YouTube videos on stucco repair.  I went to Home Depot and bought metal lath and powdered stucco mix.  I enlisted Tony's help to apply the lath.  First we broke off all of the loose stucco.


Uh oh!  This was going to be a bigger project than I had anticipated!  We considered making another front door, but decided that would look odd!

I wanted to square up the hole like I had seen on the YouTube videos but thankfully Tony vetoed that idea.  He thought we shouldn't make the hole any bigger than it already was. We attached the metal lath using lath screws, making sure every area was covered with lath.


Then it was time to mix the stucco.  Tony loves his power tools so he hooked up the paint stirrer to the drill to stir the stucco.  We mixed the stucco in the garage and then by the time we carried it to the front porch, it had hardened into a bucket-sized chunk of concrete. We decided that we would only mix a small amount at a time and still, it hardened before we could get it on the wall.


The sun boils down on our porch in the afternoon and that made the stucco harden even faster so I started applying a small bucket of stucco every morning.  It was slow work.


Tony did some Googling and found that adding lime to the stucco mixture would cause it to harden slower.  This helped a lot and I was able to apply 3 small buckets of stucco every morning after that.


I think it took me about 2 weeks to get the entire hole covered with stucco. Of course I had to go on vacation for a few weeks to give the stucco plenty of time to dry. :)  When I got home, I mixed up one more bucket of stucco and put on some final touches.


We had some paint left over from the last time we had the house painted.  We got out the drill and the paint stirrer and mixed it up.  Even painting was slow-going, but I finally got it covered.  The paint didn't exactly match so I had to paint the entire wall.  When it dried, it matched a lot better.


Voila!  Good as new! This was a difficult and time consuming project and I now understand why no one would call me back!


Sunday, February 28, 2016

Paws Awhile - From Amish to Anchors!

When we bought Paws Awhile in September 2013, the decor was a bit, ...well..., dated.  The theme was more like an Amish country home than a Beach bungalow.


We obviously needed to redecorate the entire unit but we had bigger fish to fry - we wanted to update the kitchen, living area and master bath before we spent too much time on aesthetics. My sister had surprised us by redecorating the guest bedroom a year before and we loved it, but we just hadn't made time to work on the master. Once the major renovations were done, though, it was time to give the master bedroom some attention.  I wanted to surprise Tony with the new decor so I asked my sister to come to help.

Mary Jane is very experienced with "Shabby Chic" painting.  Following her instructions, I bought paint, plaster of paris, and wax. We mixed the paint, plaster of paris and water and painted two coats on each piece of furniture.


While the paint was drying, we went shopping.  We decided we wanted to have a navy & white nautical theme.  We found a couple of options for quilts and were thrilled when Beals had a great sale on our first choice and a matching throw pillow.


When we got home, we started waxing the furniture to give it the shabby look.  The top drawers and headboard had a lattice work design that didn't really look good with the white paint so we decided to paint them blue to match the new quilt.


With more paint to dry, we had time to do more shopping so we swung by a couple of thrift shops to look for a piece of furniture where we could hide Lola's litter box.  We found a toy chest at the Humane Society store that would be perfect.  It needed a matching cushion so we hurried over to Jo Ann's to get some fabric and foam for the cushion.  I finished covering the cushion at the condo but had to take the cover home to add the anchor embroidery. I was able to keep this hidden from Tony since he rarely visits my sewing dungeon!


The quilt set came with two king sized pillow shams that I didn't want so I decided to take them apart and use the fabric.  The shams were blue and white striped on the front and white with blue anchors on the back.  I used the front of the shams for curtains and the back for a pillow and some accents for the windows.


We used matte blue spray paint to paint the brass lamps and drawer pulls. My seashell knitted afghan perfectly coordinated with the decor! 


Gerry, the manager of our condo complex, saw us going by with the spray paint and when she found out we were decorating with blue and white, donated a seashell picture to match!


I didn't say anything to Tony about the new decor so when we came down last Thursday, I was excited to see what he would say.  At first, he only noticed the new quilt and said, "That looks nice."  We were still unpacking and getting settled so I didn't say anything more.  After a few minutes, he came out of the bedroom and was properly surprised and pleased by all the work we had done!


We are thrilled with the new look!  We really feel like we are at the beach now!