Sunday, August 18, 2013

Mylar, its not just for balloons anymore!

Who knew mylar was so versatile?  I learned about it at an embroidery conference.  It can be used to give an embroidery project an extra special sparkly "pop" and people will wonder how you did it!  


This project was for a wedding shower.  I really wanted to go to the shower but already had plans to go out of town.  I was trying to think of a special gift to send when I got an email from the bride's mother, one of my very close friends from my college days.  She suggested that I make a garter & pillow for the bride using the design from the wedding invitation. I thought this was a great idea since the invitation was such a cute design.


The heart was easy to digitize and I used one of the built-in fonts to add the text, but it just looked so plain, it needed something.  I remembered taking a class at an embroidery conference where we used mylar.  I had several sheets of it so I decided to utilize it in the project.  I added a circle of stitching using a very open pattern so the mylar would show through.  Once I finished the design, I transferred it to the machine and hooped a piece of white satin.  Over the satin, I placed the sheet of mylar and started stitching.


Notice how the clear mylar starts picking up the color of the thread (purple)?  I finished stitching the design before tearing the rest of the mylar off.


Once I finished the stitching, I tore off the rest of the mylar and saved it for my next project.  Then I finished making the pillow, adding a 1 1/2 inch ruffle to the edge.


I liked it, but it looked kind of lonely so, at the suggestion of the bride's mother (who has great ideas), I made a matching garter.  I tried using mylar but the design was just too small and it didn't look right.


Now my gift is ready!  Hope the bride likes it!


My friend just sent a picture of the bride opening her gift!  I think she likes it!!!


Monday, August 12, 2013

Money Money Money!

Here's another one of my "In the Pocket" applique embroidery designs.  I've had a lot of fun with this one.  I've worn it to Vegas, on tax day, to a house closing and to a charity auction!  I've gotten a number of double-takes.  People enjoy trying to take the money out of my pocket!


To create the design, I took some money out of Tony's wallet and scanned it.  He never missed it, so I didn't see any need to put it back.  :)


I had fun doing the digitizing.  It took awhile to get it to look realistic.  I had to do a lot of samples before I got something I was satisfied with.


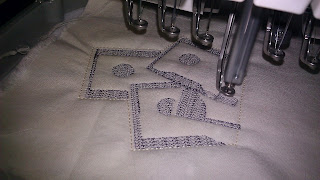
This one is pretty simple to stitch out.  There's just one little difference between this and most of my other applique designs.  The satin stitch that holds the applique in place is stitched after the rest of the design instead of immediately after tacking down the applique fabric.  Let me explain.

The first series of stitches is the placement line.  It is sewn on the hooped garment to show where to put the applique fabric.  Then the applique fabric is placed over the placement stitch and the next series is stitched.  This is the tack-down stitch.  Normally, you would trim around the applique fabric at this point, but with this design, I wait to do the trimming until after I have stitched out the interior of the design.


Once the interior of the design has stitched, but before the satin stitch starts, I trim around the applique fabric.


The satin stitch finishes the edge of the applique and then, if desired, the pocket can be appliqued on using the standard applique method, folding the top edge of the pocket fabric to the inside before placing it over the placement line.  After the tack-down stitch, trim away the excess fabric and sew the satin stitch to finish the edge.


There you have it!  Money in your pocket!


If desired, you can just applique the money on an existing garment that has a pocket and skip the appliqued pocket.  This is what I did on my shirt.


This design is for sale in my Etsy Shop.  If you know any embroidery enthusiasts, please tell them about my shop!


Friday, August 9, 2013

A Pocketful of Pens

I really enjoy creating machine embroidery designs, especially applique.  For those of you who aren't in the know about applique, it just means integrating fabric, or really, anything into an embroidery design.  In this design, I use both see-thru vinyl and denim as my applique materials.  It gives the design a realistic look.


Its kind of hard to see it in the picture, but the vinyl is appliqued over the glasses so that light reflects off of them and makes them look real.  When I wear my shirt, people often do a double-take to see what is in my pocket.

The first step is to create the design.  For this one, I used the real items as my pattern. I took a picture of the items I wanted to use in my design and imported the picture into my software.


Then it was just a matter of digitizing the design, something I've gotten pretty good at, if I do say so myself!  I create the shapes and then add the stitches. I have to think about the layering and what parts need to be stitched first, especially with applique.


Next, I write the design to a USB Storage device and load it onto my machine.  I have a BabyLock 6 Needle Machine which I love!  I can use the controls on the screen to position the design where I want it in the embroidery frame.  A little trick I have learned is to push the scissor button to drop the needle and see exactly where the center of the design is on the garment.


With the 6 needle machine, I can load up all of my thread colors so that I don't have to stop and change the thread every time there is a color change.  I try to digitize the designs so that the same colors stitch in the same step, but that is not always possible when layering the designs.

I stitch out the design until I get to the first applique.  See how the earpieces for the glasses have already stitched out, so they will be behind the clear vinyl like a real pair of glasses?  The circle in the center shows me where to put the vinyl.  I stop the machine after this circle stitches.


 Then I cut a square of vinyl a little larger than the circle.  My vinyl has been sitting in a box for awhile so it is wrinkled.  I put it under a piece of denim and iron on top of the denim so I won't melt the vinyl. Then I put my nice flat piece of vinyl over the placement circle. There's no need to secure it - the next set of stitches will do that for me.


 I push the start button and let the machine stitch over the vinyl.  I stop the machine after this stitch is done so I can trim the vinyl.  I use a pair of curved scissors and trim as close to the stitching line as I can, without clipping the stitches (or the fabric underneath).  With this design, I was able to do the trimming without taking the frame off of the machine, but some of my more complicated designs require me to remove the frame.


The next stitches cover the edges of the vinyl and then stitch the placement lines for the pocket.


For the pocket, I used denim. I just folded over the edge to make the top of the pocket, then placed a piece of fabric over the placement lines, matching the folded edge with the top ends of the placement lines. I sew the next line and then trim the denim as I did with the vinyl.


The final step is to sew the satin stitch over the edge of the raw fabric to keep it from raveling.


And there you have it!  A pocketful of nerdy accoutrements!  
Wouldn't this make a fun gift for a teacher, student, or co- worker?  You can put the design on a T-shirt or, leave off the appliqued pocket and put it on a dress shirt that already has a pocket.

I'm selling this design at my shop on Etsy.  If you know any machine embroiderers who might be interested, please pass along the link.

This is what it looks like on my dress shirt!  You can buy the watch design at my Etsy shop too!